XPS/EPS Bonding Adhesive Mortar - SA801
| Place of Origin: Shanghai China (Mainland) | Brand Name: SA | Model Number: SA801 | Usage: Joint Mortar |
| Type: Cement Mortar | Quality System Standard: ISO 9001:2008 | Components: Cement,sand,emulsion polymers,cellulosic rheology modifiers | Application: energy-efficient exterior insulation and finish systems (EIFS) |
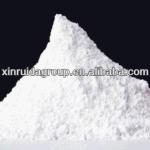
| Appearance: Powder | Color: Natural cement grey |
Styroglue Drybond
A Premium Polymer-modified, Cement Adhesive
Product Description
Styroglue drybond is a premium, dry blend, portland cement-based, polymer-modified adhesive, which is field mixed with water. Styroglue drybond may be used as an adhesive for EIF Systems and EPS foam shapes. Additionally, it may be used as a levelling coat over approved substrates.
Basic Uses
Ideal for joining polystyrene foam to construction supports, on concrete walls, brick partition walls, renders, filled walls with mortars and all the surfaces that require insulation,
the function of this product is to fix the thermal insulation layer onto the wall.
Coverage
Approximately 4.6 m2 to 5.6 m2
Shelf life and storage:
6 months after manufacturing date in dry ventilated place
Product advantages
·Good adhesive strength with substrate and insulation board
·Good application property
·Good anti-slip property
·Single component and only mix with water, easy to be controlled
·Good compatibility with other components of the whole system
EPS adhesive for the following substrates:
1. Exterior grade gypsum sheathing
2. Glass Mat gypsum sheathing
3. Masonry, concrete and cement board
4. Thermal insulation panels
Mixing
1. Add 6L of potable water to a clean pail.
2. Slowly add one bag of Styroglue drybond to the water, leave the bucket with the adhesive for several minutes, before mixing it.
3. Mix the compounds thoroughly, on one hand manually, by using a trowel or mechanically, by using a drill mixer.
Application
1. Use a trowel to apply mortar alongside the edges of the boards, as shown in the image. The thickness of the adhesive shouldn’t be greater than 1”/2.5 cm, as otherwise you won’t be able to fix them properly on the concrete wall. If the wall surface has numerous irregularities, it is better to apply the mortar over the polystyrene boards, as shown in the image. Basically, all you have to do is to apply six mounds of adhesive on the polystyrene sheet.
2. After we have applied the adhesive on the polystyrene sheets, we have to install them horizontally on the concrete wall. Consequently, you should start fixing the boards from the bottom corner of the wall, using a full sheet.
3. Continue installing the polystyrene sheets until you reach the end of the row. Make sure the edges of the boards are aligned each other, as to make a professional job.
4. The next row should be installed vertically, as to give better strength to the insulation. Work carefully, as to make sure the boards are level and aligned properly. If you need a smaller piece than a full board, you have to use a hand saw to make the cut.
Product specification
Surface Preparation
1. Clean the substrate with high pressure water
2. Remove the old paint and putty on the substrate
3. Frost should be avoided
4. Repair the crack or joint in the substrate. Next step at least 48H later
5. The surface must be leveled and the deviation must be less 4mm
Safety
1. May cause serious damage to eyes
2. May be sensitive to skin in case of contact. lrritable for eyes,respiratory system and skin
3. Keep out of the reach of children
4. Avoid breathing the dust
5. In case of contact with eyes,rinse eyes immediately with plenty of water and consult a doctor
Construction Guide
2. Adhesive Applied to Insulation Board (SA801)
3. Insulation Foam Board
4. Base Coat
7. Base Coat
9. External Wall Tiles
10. Flexible Tile Grout
| Packaging Detail:Moisture resistant, 25kg (55lbs) bags |
| Delivery Detail:3 days |


