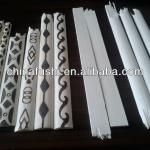
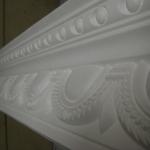
celling cornice assembled line ps-line manufacturer - XHA13-1-S
| Place of Origin: Zhejiang China (Mainland) | Brand Name: Xinhai | Model Number: XHA13-1-S | Material: plastic |
| color: GOLD |

We are direct factory,we supply high quality for every custom.
(1).We're specialized in ps cornice and fireplace and a lot of decorative material.
(2).The decorative material are made of PS and with european antique style.
(3).Its durable,waterproof,easy to install and difficult to deform.
(4).Ideal for entertainment place,villa,hotels,homes,public places and so on.
(5).We can garantee you high quality,fashionable design,competitive price and remarkable service.
Introduction of fixing the lamp ceiling
Preparation:
1. Locate the center of the room ceiling (or make use of the reserved lamp position), then mark the outline of the lamp ceiling on the ceiling being decorated for positioning the lamp ceiling late.
2. For fixing the lamp ceiling ,drill the fixing holes in every 4060cm distance with the electric drill of 6 diameter along the sliding slot of the lamp ceiling.
3. Prepare two Tshape supporters made of wooden bar(40*40mm in cross section ).The sizes of the supporters are 1.2 meter in length,2.1 meter in height. The traverser of the supporters shoulel be wrapped with sponge to avoid damaging the lamp ceiling.
Installation:
1. Lift the lamp ceiling ,pull the electric wire form the ceiling through the center hole of the lamp ceiling. Then locate the lamp ceiling exactly along with the marks made on the ceiling support the lamp ceiling with two T shape supporters the traverser of the supporter should touch with the bend edge of the lamp ceiling without moving.
2. Drill the fixing holes on the ceiling through the holes prepared in the lamp ceiling with the drill of 6 diameter.
3. Insert the wooden piece or expandable plastic screw into the hole , then fix it with wooden screw. Please remember to mark the screw with color.
Attention:
1. For the sake of safety ,if the lamp ceiling is more than 2.5 meter 2 in area ,it is necessary to drill another two reinforce holes of 610 diameter within the area of 5cm away from the center as shown in the picture below to add another two fixing screws.
2. It is prohibited to fix the lamp directly on the lamp ceiling .its recommend to fix the lamp with the reserved item on the ceiling.
Description of fixing the dexorating line
1. First,nail the wooden lot (15*60*50mm)in every 33cm distance with the cement nail in the place where the line will be fixed.The place for fixing the wooden lot should be chosen exactly in the position where theseain of decorating line is located.
2. Second,cut dowm a section of sliding block with a complete pattern on it, then plane the sliding edge .this section of sliding block is prepared for covering the position where the nail is licated with glue.
3. Third,plaice the decorating line on the wooden lot nailed exactly,then slide away the sliding block a little to left a space for nailing the line ,repeat this way ,till the final seam is left ,finally the seam is covered with the section of sliding block prepared by glue,in this way, seamless effect is reached.
| Packaging Detail:carton packaging. |
| Delivery Detail:a week |


