
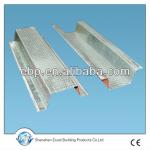
75/73 Galvanized Metal Studs - Galvanzied steel
| Place of Origin: Tianjin China (Mainland) | Brand Name: RON | Model Number: Galvanzied steel | Material: Galvanzied steel,Galvanised Steel |
| Width: 24mm,30mm,35mm,38mm,50mm,60mm,70mm,75mm,90mm,100mm | Height: 25mm,30mm,35mm,40mm,45mm | Thickness: 0.3-1.0mm | Rolling Progress: 13 times from (2mm~0.5mm) |
| Applicability: For gypsum board drywall partition and ceiling system | Zin Coted: 60~180g/m2 | Surface: Galvanised, punching, full with dot,with holes | Characteristic: Easy to operate and solid; rust resistant |
| Packaging Details: Standard Export packaging |


75/73 Galvanized Metal Studs
-- Metal studs
-- Metal studs
-- Metal studs
Drywall Partition System
Detailed Product Description
Drywallis a construction product commonly used to finish building’s interiors. For hundreds of years prior to its development, the interior walls of buildings were usually made of plaster. This was applied in layers over narrow boards calledlathsthat were nailed directly to the studs.
In the mid-twentieth century,drywall, also called plasterboard, sheetrock orgypsumboard, came into widespread use, and now almost all buildings havedrywallwalls.
Drywallhas a number of advantages over plaster, ease of installation being the most obvious. Any reasonably handy person can refinish a room withdrywall, and you don't have to take any training or join a guild to learn how to do it.
Drywallis made usinggypsum plaster, which is then covered on both sides byfiberglassmatting or heavyweight paper. Depending on the manufacturer, certain additions, such as anti-mildew and fire-resistant materials, are mixed with the gypsum plaster before applying the paper.
1. Characteristic
1) Galvanized Zin coating will protect the channel from being rust;
2) Flexibility of application makes each ceiling tile/plasterboard easily installed and disconnected;
3) Size adjustability can easier to match your request;
4) High quality leads longer life span & higher strength;
5) Better function of dealing with both high tensile stress and blending stress.
2. Specification
Interior Drywall Partition
| Picture | Item | Size | Thickness | Tolerance | Recommed match |
| Stud | 75x45x3000mm | 0.45mm to 1.0mm | Diamension:+-0.1Thickness:+-0.02 | 1pcs/m2 | |
| Track | 75x40x3000mm | 0.45mm to 1.0mm | Diamension:+-0.1 Thickness:+-0.02 | 0.334pcs/m2 | |
| Corner bead | 25x25x3000mm | 0.45/0.5/0.6 | Diamension:+-0.1 Thickness:+-0.02 | 0.2pcs/m2 |
Interior Ceiling
| Picture | Item | Size | Thickness | Tolerance | Recommend match |
| Main channel | 35x18x3000mm | 0.6 / 0.7 / 0.8 / 0.9mm | Diamension:+-0.1 Thickness:+-0.02 | 0.334pcs/m2 | |
| Omega | 35x22x3000mm | 0.5 / 0.6 /0.7mm | Diamension:+-0.1 Thickness:+-0.02 | 1m/m2 | |
| V channel | 0.6 / 0.7 /0.8mm | Diamension:+-0.1 Thickness:+-0.02 | 0.334pcs/m2 | ||
| DC 50 | 0.5 / 0.6 /0.7mm | Diamension:+-0.1 Thickness:+-0.02 | 1m/m2 | ||
| DC 60 | Diamension:+-0.1 Thickness:+-0.02 | 4m/m2 | |||
| Corner Angle | 25x25x3000mm | 0.4 / 0.45 / 0.5mm | Diamension:+-0.1 Thickness:+-0.02 | 0.2pcs/m2 |
3. How to Install
Hanging drywall
| 1. | Finish all the electrical, plumbing and insulation work that is necessary in your walls before you begin to install any drywall. |
| 2. | Mark the location of the wall studs on both the floor and ceiling, so you will be able to find them when you begin installing the sheet rock. |
| 3. | Lay a piece of scrap on the floor to raise the drywall off the floor (about 1/2 inch). |
| 4. | Starting in a corner, place the drywall onto the scrap and butt it into the corner. Ensure the other end of the sheet falls onto the center of a wall stud. (Sheets can be installed either vertically or horizontally. Most pros like to install it horizontally, since this means fewer joints to fill and the main seam is about four feet off the floor - a comfortable height to work at.) |
| 5. | Use drywall nails or your drywall gun and drywall screws to fasten the sheet in a couple of places to hold it. Now go back, and starting in the corner, push the drywall sheet tightly against the wall studs and fasten the sheet to all the studs it is covering. Place screws every 6 to 8inches. |
| 6. | Continue around the perimeter of the room, butting sheets against each other, ensuring the ends are centered on wall studs, until the lower section is finished. |
| 7. | Measure from the top of the bottom sheet to where the top of the wall will be (this will be the height of the top piece of drywall). If the distance is less than 4 inches, cut the drywall sheet to the proper height and install it with the cut edge at the top. |
| 8. | Continue installing the top row all around the room. |
Cutting drywall
| 9. | Measure and mark where you want to cut the drywall. Use a straight edge or a chalk line to join the marks. Always mark and cut on the front side of the panel. |
| 10. | Using a sharp utility knife, score deeply along the cut line. |
| 11. | Stand the panel on edge and snap the cut section back. |
| 12. | Finish by cutting through the paper on the back with your utility knife. |
Cutting around outlets
| 13. | Measure from the edge of the outlet box to the edge of the panel and mark it. Now measure from the floor to both the top and bottom of the box and mark the panel. You should now have the outline of the box marked on the drywall. |
| 14. | Drill holes at the corners and then, using a drywall saw or a keyhole saw, cut the opening for the box. |
Finishing drywall joints
| 15. | Use a 6 inch taping knife to fill tapered joints (factory edge to factory edge) with a thin layer of joint compound (mud). |
| 16. | Center the drywall tape over the joint and run your knife along the tape, pushing it into the mud. |
| 17. | Cover with a thin layer of mud and let dry. |
| 18. | After the mud has dried (overnight), us a 12-inch taping knife to apply a 10-to-12-inch wide coat of mud, feathering or smoothing out the edges, and allow it to dry. |
| 19. | Apply the final coat of mud by thinning it slightly with some water and spreading a light coat over all the taped sections. Let it dry. |
| 20. | Sand the wall lightly in preparation for painting. |
| 21. | Follow a similar process (but using less mud on the first coat) for joints where cut edges butt against each other. |
| 22. | Finish inside corners by putting mud on both sides of the joint, folding the tape in half and then pressing it into the seam. |
| 23. | Attach metal corner beads to outside corners by nailing through the corner bead into the underlying stud and applying mud over the bead. |
4. Loading
| Item | Size(mm) | Quantity(pcs) | CBM | Container |
| Stud | 75x45x3000x0.5 | 9000 | 49.49 | 1x40HQ |
| Track | 75x40x3000x0.5 | 3000 | 12.55 |
| Item | Size(mm) | Quantity(pcs) | Weight(kgs) | Container |
| Main channel | 38x12x3000x0.45 | 10000 | 6318 | 1x20ft |
| Omega | 35x22x3000x0.45 | 15000 | 16269 | |
| L angle | 25x25x3000x0.45 | 7000 | 3612 |
5. Certificate
6. Application
You know what?
Correct choice for supplier is much more important than the topest sale!
And you must know:
RONBuilding Material Co., Ltd is your ever best choice!!!
** Serious:our team will never “play with” you & product.
** Experienced:we dedicate ourselves, gaining 18 years of producing experience & 7 years of exporting.
** Professional:we focus on ceiling & partition system.
** Quality:10 years guarantee, any problem, just come back and fly at us!
** Service:we are not dare to say you are our God, but you must be our well-beloved partner.
** Friendship:you, are not only customer, what’s more, are definitely our sincere friend!
** Win-win:you win, we win; you are happy, we are happier for you!
*
*
*
More benefits you will find out when you come to us,RONBuilding Material Co., Ltd!
| Packaging Detail:Standard Export Carton Packing(NM)20PCS/BUDLED 26TON/20FT |
| Delivery Detail:10days |
Related Product for 75/73 Galvanized Metal Studs
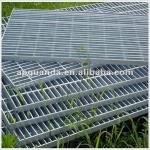
flooring and platform steel grating panel/walkway steel grating/walking steel grating
Steel Grating1>Bearing bar pitch:30,40,60mm
2>Cross bar pitch;50,100mm
3>Plain,Serrated,I-shape
4>Hot-dipped galvanized,
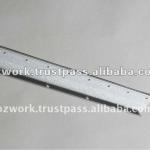
starter bars
starter bars1.high corrosion resistance
2.high strength
3.workability
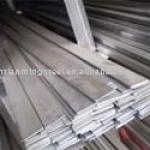
FLAT BAR/ PLATE
These products can widely used in building , electrical, post information, steel structure, steel frame,highway,bridge,car makin
Galvanized Steel Grating
Galvanized Steel Grating1.26 years exporting experience
2.OEM Service
3.Applications:Fences Stair
4.Standard & Non-standard

Prefabricated Construction Commercial&Residential Multi-story Highrise Steel Building
1.Qualification:CE(DIN18800),ISO9001:2000,2.Minimum Steel Quantity
3.High Construction Efficiency
4.Cost Effective:$900
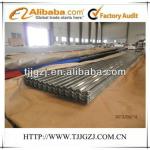
roofing sheet/galvanzied steel roofing sheets
roofing sheetwave high: 18+/-2mm
wave pitch: 76.2+/-3mm
reasonal priceprime quality
life:15-20 years
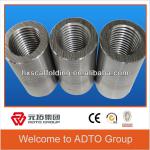
construction parallel thread rebar coupler
thread rebar coupler(1) diameter 12-50mm.
(2) Materials: 45# carbon steel.
(3) Treatment: anti-rusted,engraved
ISO9001
ribbed bar reinforcing welded mesh panels bangda factory and dongshengyuan trading
reinforcing meshsize: 2m x 5.7m
standard hole: 150 x 150mm, 200 x 200mm, 300 x 300mm
deformed steel bar and round bar

Cost Price Color Coated Aluminum Coil
PE/ PVDF Cost Price Coated Aluminum CoilFrom No.one biggest factory in China
Width :2100mm Max,Thk:1.5mm Max
Delivery:7days
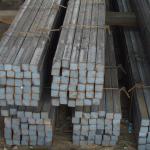
mild steel square bar
1. BV &9001:20002. Steel manufacturer, 30 years experience
3. Near the seaport, low cost
4. Good reputation &service
Hat Channels, Hat Channel Manufacturer
galvanized furring channel1) Material: galvanized steel
2) Zinc coating: 100~275g per square meter
3) Yield strength400mpa
Snap tie
Snap Tie1>Material:45# steel
2>Style:4 3/4" x 6" /8" / 10" /12"........24"
8 1/4" x 6" /8" /10" /12"..........24